Set up AZC 3D Viewer in your theme
Connect your workspace, add the product block, and verify the customer experience.
Before you start
Use an Online Store 2.0 theme with JSON product templates and a section that accepts app blocks. Vintage themes are not supported. This block is available on product templates only.
Select the theme you intend to configure in Online Store → Themes. Use Edit theme or Customize, depending on the admin version. The app's “Add 3D block to product page” button opens the current theme and requests a block insertion; inspect the editor before adding another block.
Editing an unpublished theme affects its preview. To make that theme visible to customers, publish it only when you are ready. Changes to a shared product template affect all products assigned to that template, while each product loads its own linked model.
1. Connect your workspace and link a model
- Open AZC 3D Viewer in Shopify Admin. In AZC Connection settings, create or select a Shopify connection using the storefront address shown in the app. Generate a connection code and enter it in Connect workspace. Codes are valid for 10 minutes and can be used once.
- In the AZC Asset library, upload a STEP or GLB file, or choose an existing asset. Wait until the preview is ready. From the asset menu, choose Publish to website, select this store connection, then Authorize store display.
- Return to the Shopify app and select Refresh. Choose the Shopify product and AZC model, then Save association. Use an active product available to the Online Store and add at least one product image to test image/3D switching.
2. Add the theme app block
- Open your chosen theme's editor. Select Products and the template assigned to your product. Select the intended product in the preview. Check its template assignment in Shopify Products if necessary.
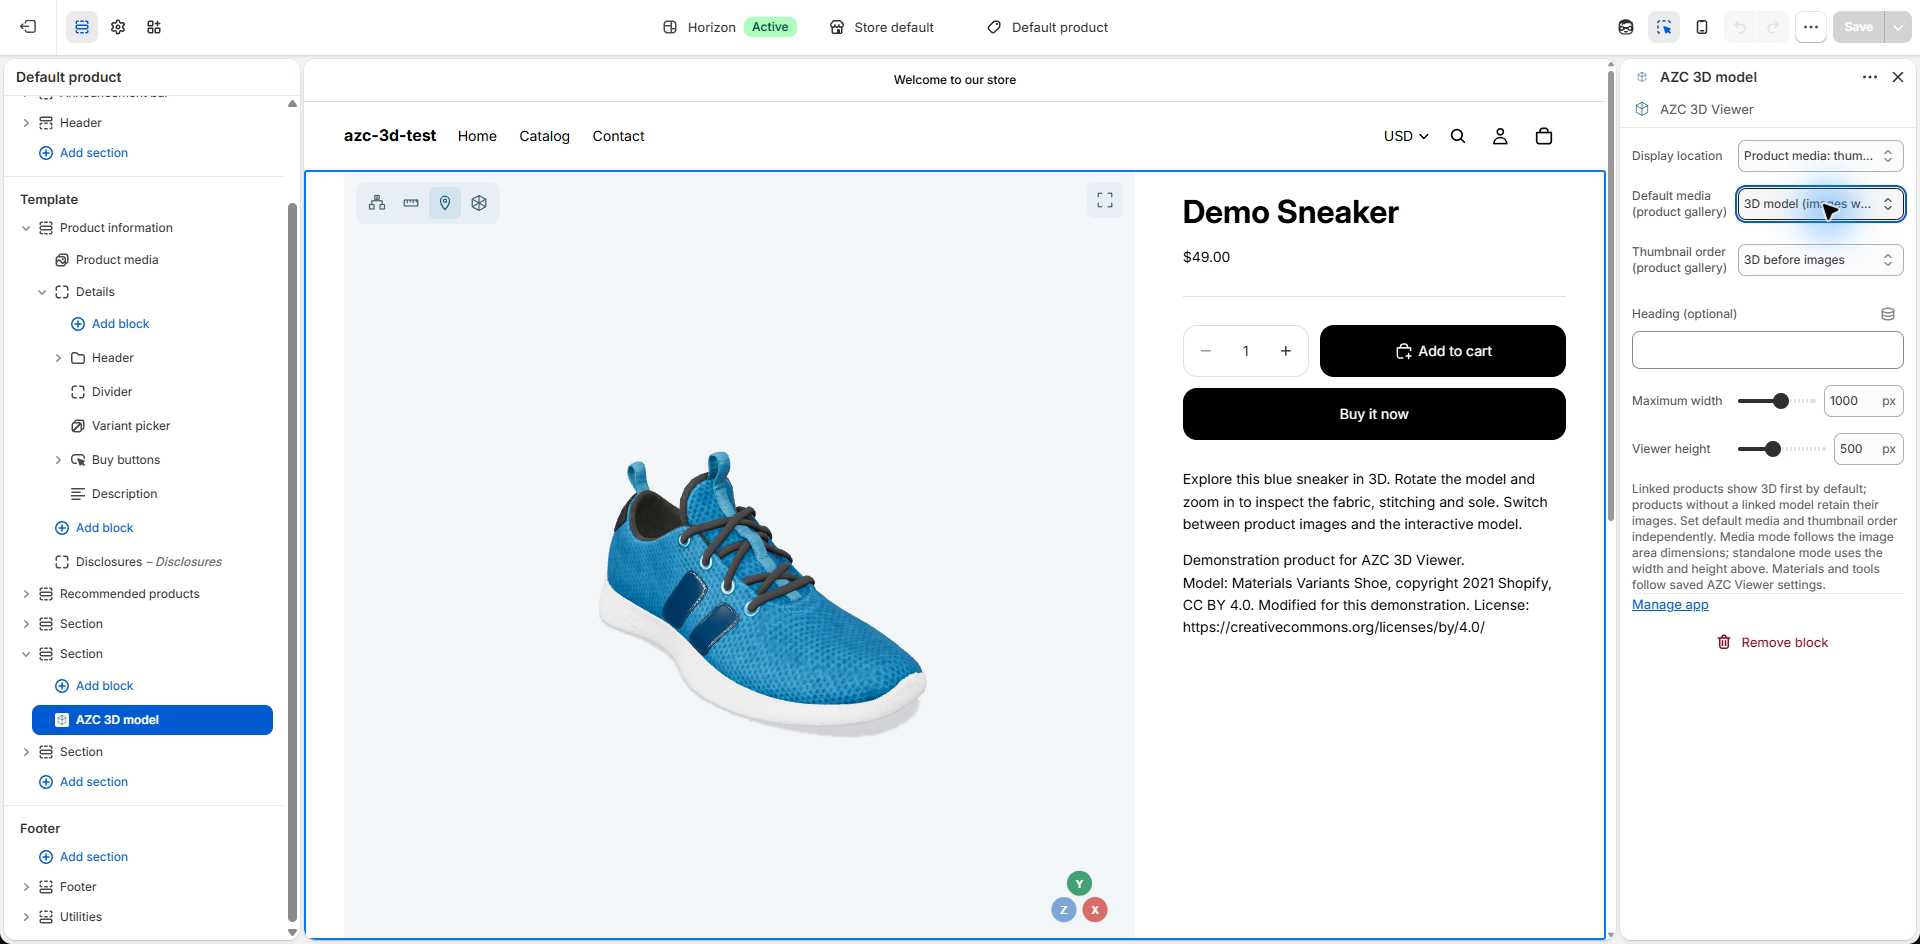
- In an eligible section, choose Add block → Apps → AZC 3D model. Alternatively, use Add section → Apps where the theme supports app sections. The app's shortcut can add a new app section automatically.
- Use one AZC block per product template. Configure every product template that should display models.
- If the Apps option is missing, try a section that accepts app blocks or a compatible Online Store 2.0 theme. Do not edit theme code to insert the viewer.
3. Configure presentation
| Display location | Product media: thumbnail navigation uses the supported product gallery. Standalone block (current position) displays the viewer at the block's position in the template. |
|---|---|
| Default media | For gallery display, start with the 3D model or product images. Products without a linked model retain their images. |
| Thumbnail order | For gallery display, place 3D before images or images before 3D. This setting is independent of Default media. |
| Heading, Maximum width, Viewer height | Set an optional heading and dimensions for standalone display. Gallery display follows the theme's product media area. |
| Materials, camera and viewer tools | Manage these in the AZC asset preview's presentation settings. Save settings in AZC, then reload the storefront to verify. |
Gallery integration depends on the theme's media structure. If gallery mode does not integrate correctly, use standalone display and verify it in your theme preview.
4. Reposition, remove or restore
Reposition: drag the AZC block or its app section in the editor sidebar to an eligible position. This determines the location of standalone display. In gallery mode, use Thumbnail order to change the 3D thumbnail's position.
Remove: select AZC 3D model, choose Remove block, then Save. Repeat for other templates if needed. This removes the display from that template; it does not delete the AZC asset or the saved product association.
Restore: add the block again and save. Products with valid, authorized model associations can display their models again.
Remove only one product's model: use Remove model in the app instead of removing the template block. The product images remain available. Select a model and save its association to restore it.
5. Save and verify
- Select Save in the theme editor. Preview the same theme you edited; use the live storefront only when testing the published theme.
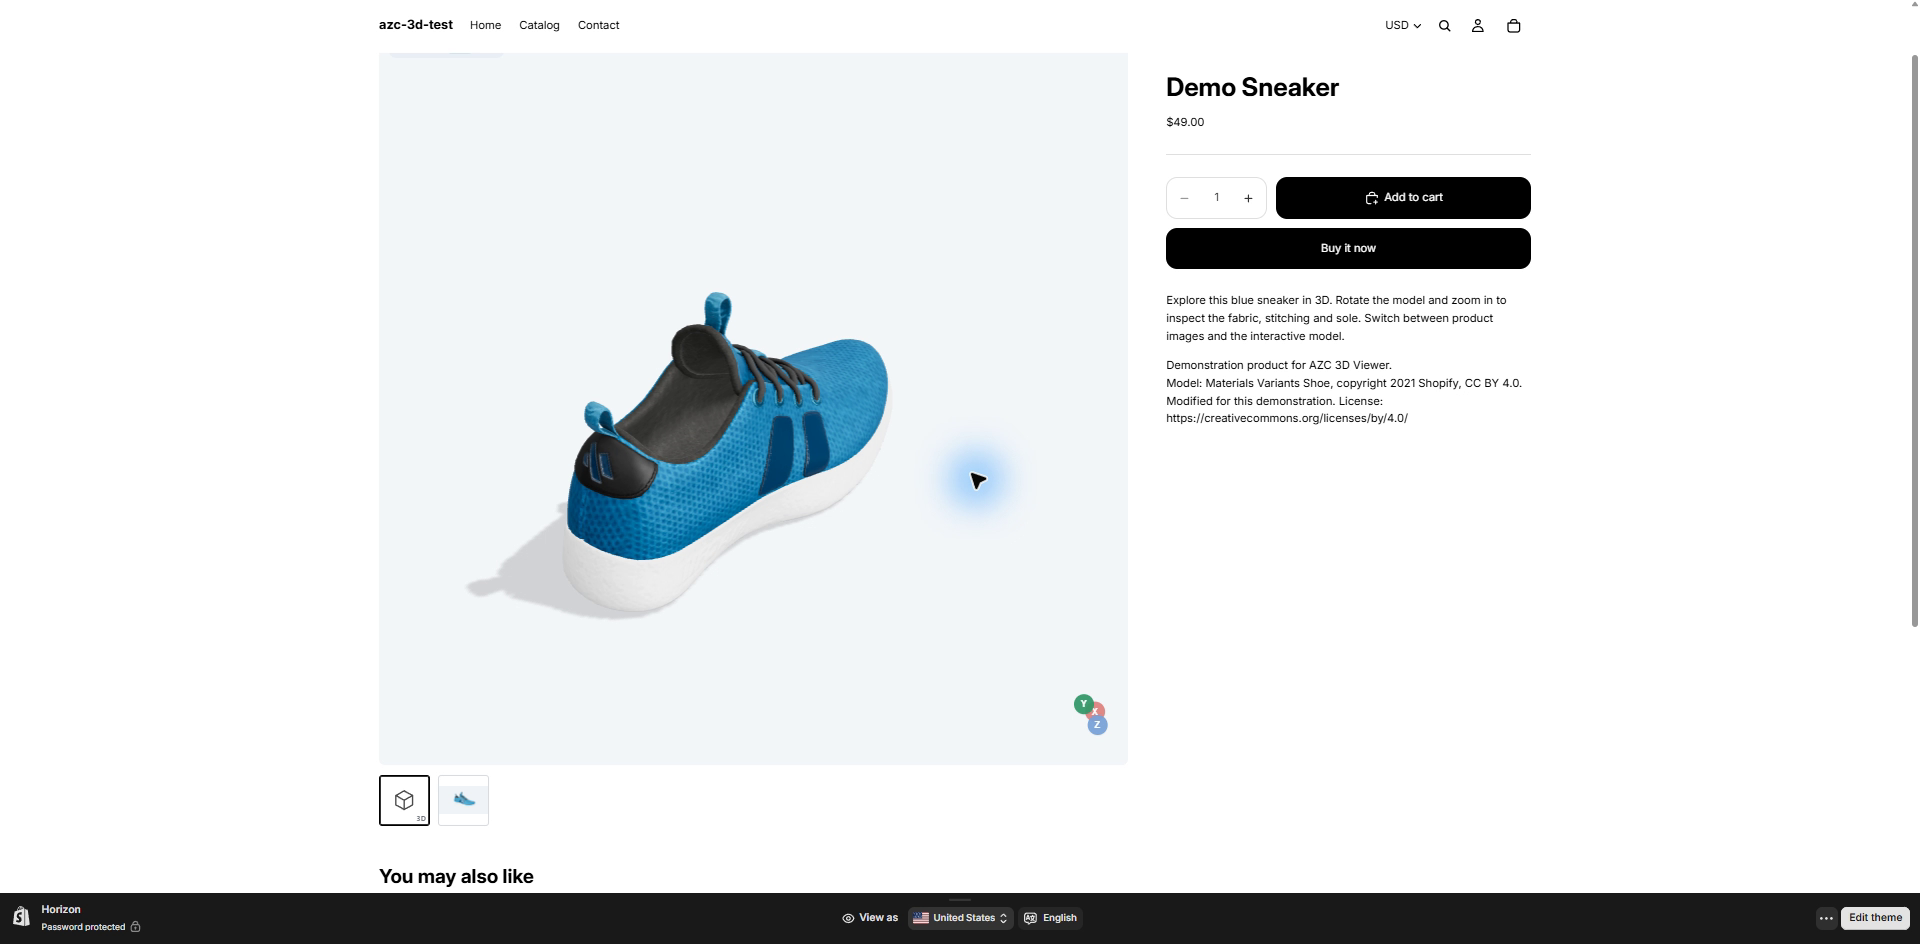
- Open the intended product. Drag inside the viewer to rotate and use the mouse wheel to zoom. Confirm that the model matches the product.
- In supported gallery mode, switch between the product image and 3D thumbnails. Check Default media and Thumbnail order independently.
- Check the mobile preview and repeat on any other product templates you configured.
Troubleshooting
- No AZC block in Apps: check theme compatibility, the selected product template and the section's app block support.
- Model missing: confirm the workspace is connected, the asset is ready and authorized to this store, and the product association is saved. Check the template assignment and that the AZC block is saved in the theme you are viewing.
- Model in the app but not the storefront: the in-app preview does not install the theme block. Follow step 2.
- Wrong model: check the product selected in the app and the product selected in the theme preview.
- Image/3D switching unavailable: add a product image and check gallery compatibility; use standalone mode if necessary.
- Connection code expired: generate a fresh code for this storefront address.